In this tutorial, we will see how to build your own module for Popock webApp.
The source code of the project is on github ( https://github.com/scenaristeur/solid-vue-panes/ ) .
Popock is build as a portal with different modules (inbox, chat, databrowser and many more) that uses Solid LinkedData platform as a backend.
You can use Popock at https://scenaristeur.github.io/solid-vue-panes
Popock is one of the first Vuejs app I build, after playing a lot with Lit-Element (ex Polymer) webcomponents.
Solid LinkedData platform is a backend i really enjoy as one one the core principe is to allow anyone to store its data anywhere he want...
And link this data to other people or organization data without any third party.
In this tutorial, we will create a first basic Solid Interaction, but before that lets retrieve Popock source code on your machine and create some basic file to host our module.
Then for the module, we will take the example of a simple form that store an Holacracy Tension on a SolidPod. ( Holacracy is a method of management that decentralize the power but it's not the purpose of this tuto. This tutorial is just to show you how to create a VueJs/Solid Module on Popock.
To understand what we do here, some html/css/javascript knowledge could be a very good start point, but we will try to make a tutorial as simple as possible, so if you just know how to use commandline to create files & folders on your machine, you should be able to follow what we talk about ;-).
THis tutorial has benn tested on Windows10 & Linux Mint 19.2. If you encounter some issue, or have any question, please share it Solid Forum.
Prepare your Developer Environnement
Install if you don't have it already :
- nodejs https://nodejs.org/en/download/
- git https://git-scm.com/downloads
- vue-cli (
npm install -g @vue/cli ) https://cli.vuejs.org/
Clone the repository (project source code)
Open a command line window or a terminal and use git clone to get project source code
git clone https://github.com/scenaristeur/solid-vue-panes.git
cd to the solid-vue-panes just created folder
cd solid-vue-panes
The data structure of the project should look something like that
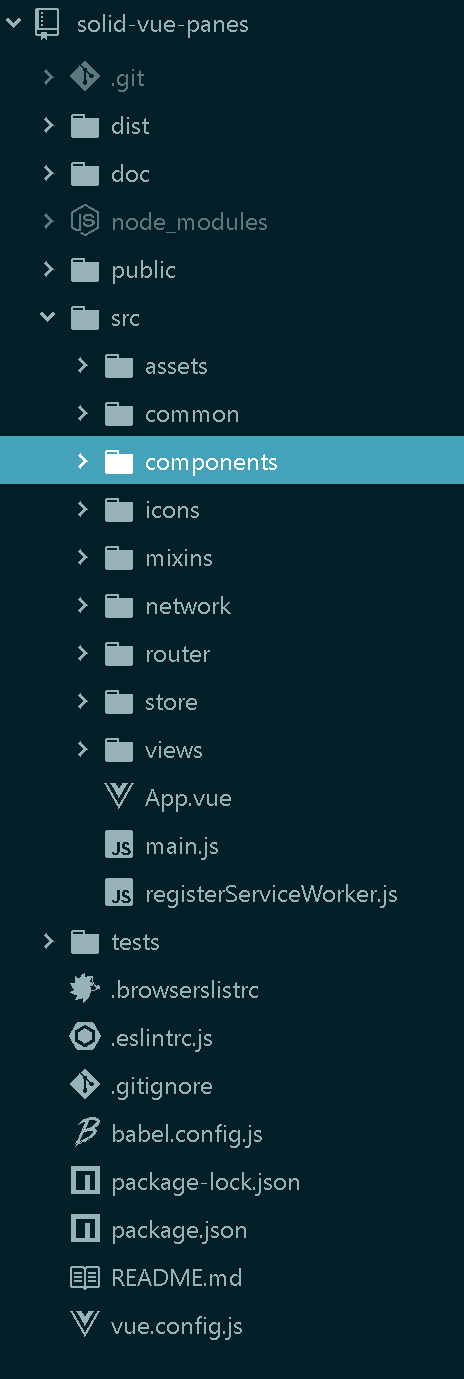
As lot of nodejs projects, the node_modules folder only appears when you type
npm install
so please type it to install project dependancies edicted in the package.json...
Some warning can be shown during dependencies installationbut that should end with something like
xxx packages installed
If everyting is ok we can go futhrtmore, but if you encountered any problem or have question, remember to use the forum.
If everything is 'OK' just start the development server with
npm run serve
Create the Tension-Module files
- create
- view
1. First, in the src/components/ folder, create a folder named "tension" or anyother name, because at he end of this tutorial, the module should have been created...
This is where the major part of our module will reside, but to display it we will create a simple view that represent the root of our module.
In the src/views/ folder, please create our TensionView.vue file.
You can duplicate the content the src/view/ModeleView.vue to get the starting content :
src/views/TensionView.vue
<template>
<div class="tension-view">
<!-- <Component /> -->
</div>
</template>
<script>
// @ is an alias to /src
export default {
name: 'TensionView',
/* components: {
'Component': () => import('@/components/Component'),
},*/
}
</script>
<style>
.tension-view {
text-align: left;
}
</style>
Aucun commentaire:
Enregistrer un commentaire